Windows & Linux User Management with Ansible
Centralized user management usually requires additional infrastructure. A common example would be an LDAP directory service combined with Kerberos. On top of that clients need to be configured correctly in order to be able to use those. It takes quite some effort to get this done and it's not really worth the effort for a smaller environment.
Looking for a centralized user management solution for my own network I came across Ansible's (Docs) user and win_user modules. Those provide the ability to manage local users on each machine yet still keep central control over them. So changing a password, adding or removing users, etc. can still be done from a single computer. And best of all, Ansible is agentless meaning that it only needs some sort of remote shell to connect to a client.
Ansible is actually a fantastic tool for pretty much all administrative operations. Not just user management. I highly recommend you check it out regardless.
What are we going to build
The specific setup described here involves three machines. Two are running Debian Linux 12 and one is powered by Windows 10. But any Linux will do and it's likely a similar process under Windows 11.
User data will be kept in a single encrypted file. So whenever you change anything this may be the only place where any changes would need to be made.
I'm neither an expert on Ansible nor Windows (especially not Windows). So if you find mistakes or just plain nonsense in this post please let me know.
These are the machines we're going to work with:
| Hostname | IP | Description |
|---|---|---|
| a1 | 10.7.57.1 | Ansible control host |
| a2 | 10.7.57.2 | Linux Client |
| a4 | 10.7.57.4 | Windows Host |
I'll use these names as hostnames by adding them to /etc/hosts on a1:
...
10.7.57.1    a1
10.7.57.2    a2
10.7.57.4    a4
Warning
In these examples I'm using the root account. This is fine for a lab environment. However I'd recommend you avoid this practice when preparing this in a productive context.
Setting up the Ansible Control Host
Ansible is a rather simple system. All it really is is a bunch of commands. There's no server or agent involved.
A control host is really just a machine where ansible is installed and configured. So this can be as many as you like. To get our example host going it's enough to just install the package on you control host. In our case that would be a1:
apt install ansible-core
Start by configuring /etc/ansible/hosts (create if missing):
[linux]
a2

[windows]
a4 ansible_user=admin ansible_ssh_private_key_file=/root/.ssh/id_rsa  ansible_shell_type=cmd
Notice that the windows host has several extra parameters. I've seen other people recommend using ansible_shell_type
powershell. However this did not work for me at all. Usingcmdis slow but works reliably. As for the path to the private key ... somehow that's required despite the fact that it's in it's default location.
Next, create an SSH key:
ssh-keygen
Follow the instructions on the screen. For our purposes it's enough to just hit enter a few times which will result in an unprotected private key.
Setting up the Linux client
Our control host needs the ability to log in to each client. By default is uses SSH to get this done. So copy the public ssh key of your control host (a1) to the client (a2). The easiest way to do this is to execute the following command on a1:
ssh-copy-id a2
You will be asked for the password. But once your key is accepted no more passwords are needed.
If you cannot log in with a password just copy the content of
~/.ssh/id_rsa.pubona1to~/.ssh/authorized_keysona2.
Creating the user database
For the sake of this example I'm putting all files in /etc/ansible. You may choose any other place to put your playbooks, data files, etc.
Since we'd like to retain the option to manage windows user accounts we need access to the passwords as plain text. A good old hash won't do. Luckily it's easy to encrypt your secrets with ansible-vault. Let's create such a vault for all our user data:
ansible-vault create /etc/ansible/common_users.yml
Enter a password of your choosing and you should find yourself in an editor in which you may enter all the user details including the plain text passwords:
common_users:
  - name: user01
    password: "123"
    state: present
    uid: 10001
    shell: /bin/bash
  - name: user02
    password: "123"
    state: present
    uid: 10002
    shell: /bin/bash
Once you've saved your data and closed the editor the file is no longer readable. Give it a try:
root@vm-ansible-01:/etc/ansible/plays# cat common_users.yml
$ANSIBLE_VAULT;1.1;AES256
65663836343632376138333639323734326432636465666130653731633439623339343361623866
...
While I'd still not go out printing this on a billboard it should be reasonably safe to keep secrets like this in a repository you control access to.
Now we write out playbook for to handle users on Linux nodes /etc/ansible/lin_users.yml:
- name: Create Linux user accounts
  hosts: linux
  become: true

  vars_files:
      - common_users.yml

  tasks:
     - name: Create common user accounts
       loop: "{{ common_users }}"
       user:
          name: "{{ item.name }}"
          password: "{{ item.password | password_hash('sha512') }}"
          uid: "{{ item.uid }}"
          shell: "{{ item.shell }}"
          state: present
Run it with:
ansible-playbook /etc/ansible/lin_users.yml --ask-vault-password
At this point you will be queried for the password of your vault that you set earlier. Enter it and Ansible should get to work.
Your result should look something like this:
root@vm-ansible-01:/etc/ansible/plays# ansible-playbook lin_create_users.yml --ask-vault-password
Vault password:

PLAY [Create Linux user accounts] **********

TASK [Gathering Facts] ********
ok: [a2]

TASK [Create common user accounts] *******
PLAY RECAP *******
a2: ok=2    changed=1  unreachable=0  failed=0  skipped=0  rescued=0  ignored=0
Give it a try and log in as one of your new users on a2. You should find user01 and user02 be be available as expected.
Preparing Windows
This is where things get complicated. But what did you expect? It's Windows ;)
Let's start with something easy. Install Python.
A lot of Windows related Ansible documentation, articles, etc. employ WinRM. Some crufty remote shell protocol I honestly never heard about. I couldn't get it to work at all. Luckily there's another (better?) way using the native OpenSSH server in Windows.
Yes you read correctly. There's an SSH module you can use in Windows. Either use Powershell (Run as Administrator!):
Add-WindowsCapability -Online -Name OpenSSH.Client~~~~0.0.1.0
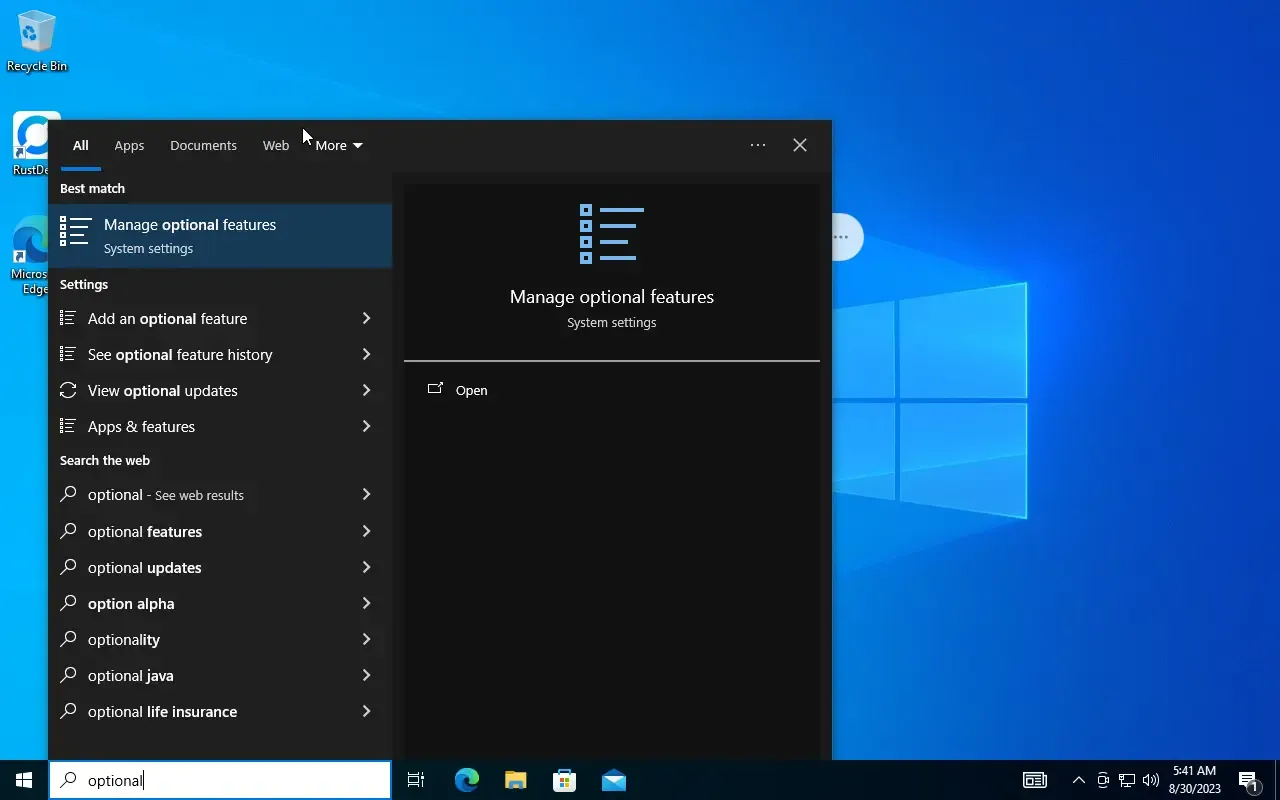
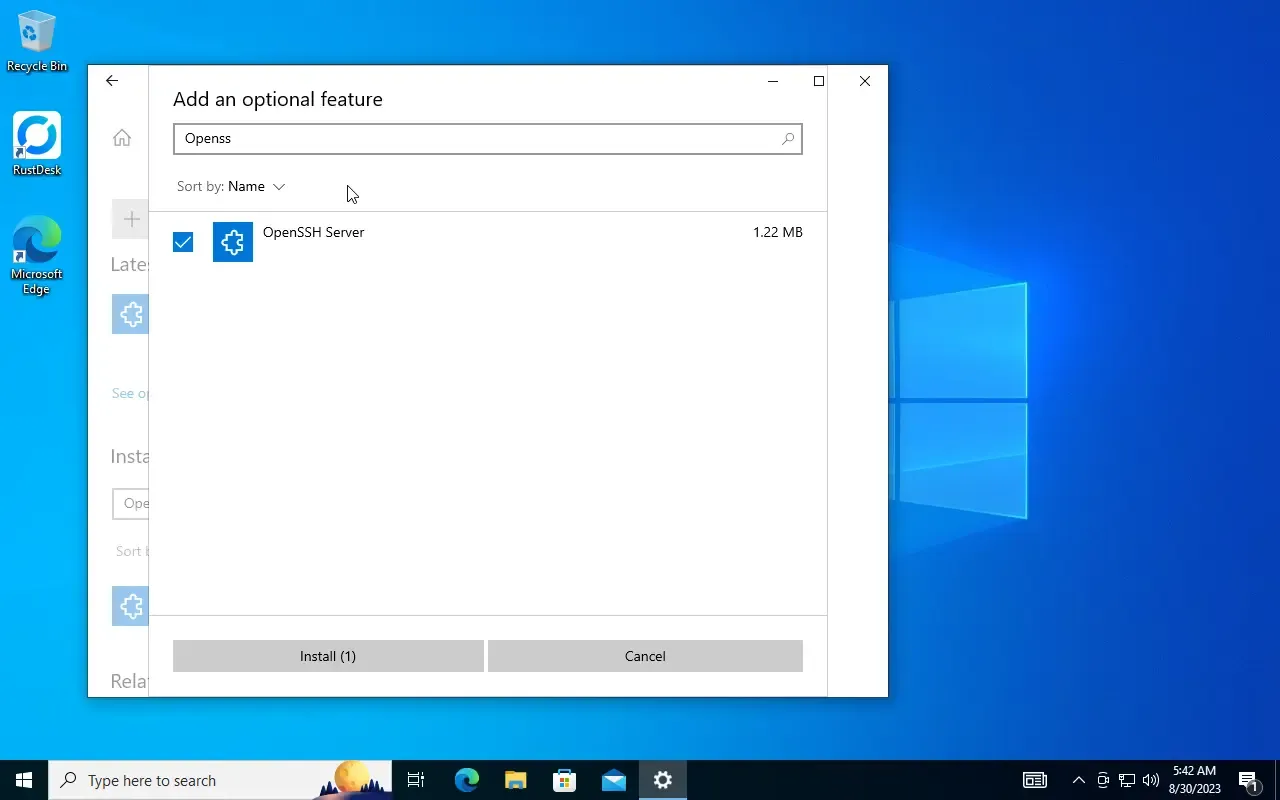
or use the Manage optional features UI to get it:
You should find a new directory: C:\Program Data\ssh
Here you will need to make a few changes. Follow them carefully as it won't work otherwise.
Create a new file C:\Program Data\ssh\administrators_authorized_keys.
Copy your public ssh key from a1 (~/.ssh/id_rsa.pub) into this file. Should be the only line at this point.
Next go to the file's Properties dialog. Open the Security tab and click on Advanced. In the bottom right you should see a button that says Disable inheritance. Click it and select Convert inherited permissions ... if asked about what to do.
Last but not least edit C:\Program Data\ssh\sshd_config to contain the follwoing line:
AuthorizedKeysFile __PROGRAMDATA__/ssh/administrators_authorized_keys
On Unix systems it's common to store the authorized_keys file in your home directory. This didn't work for me on Windows which is why I followed the advice to put them into the main ssh configuration directory.
Start and enbale the SSH Server:
Start-Service sshd
Set-Service -Name sshd -StartupType 'Automatic'
or use the UI:
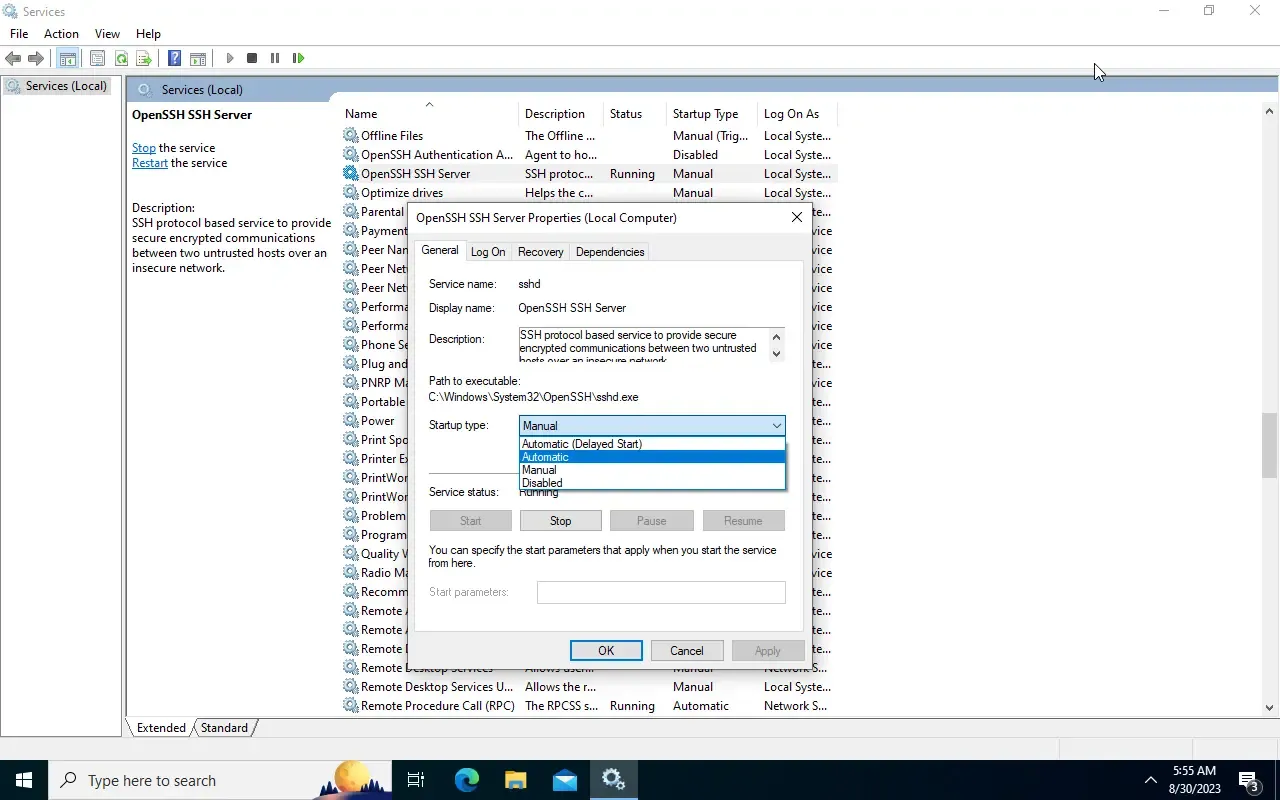
To start or restart the service, just right Click on the service and select the desired action.
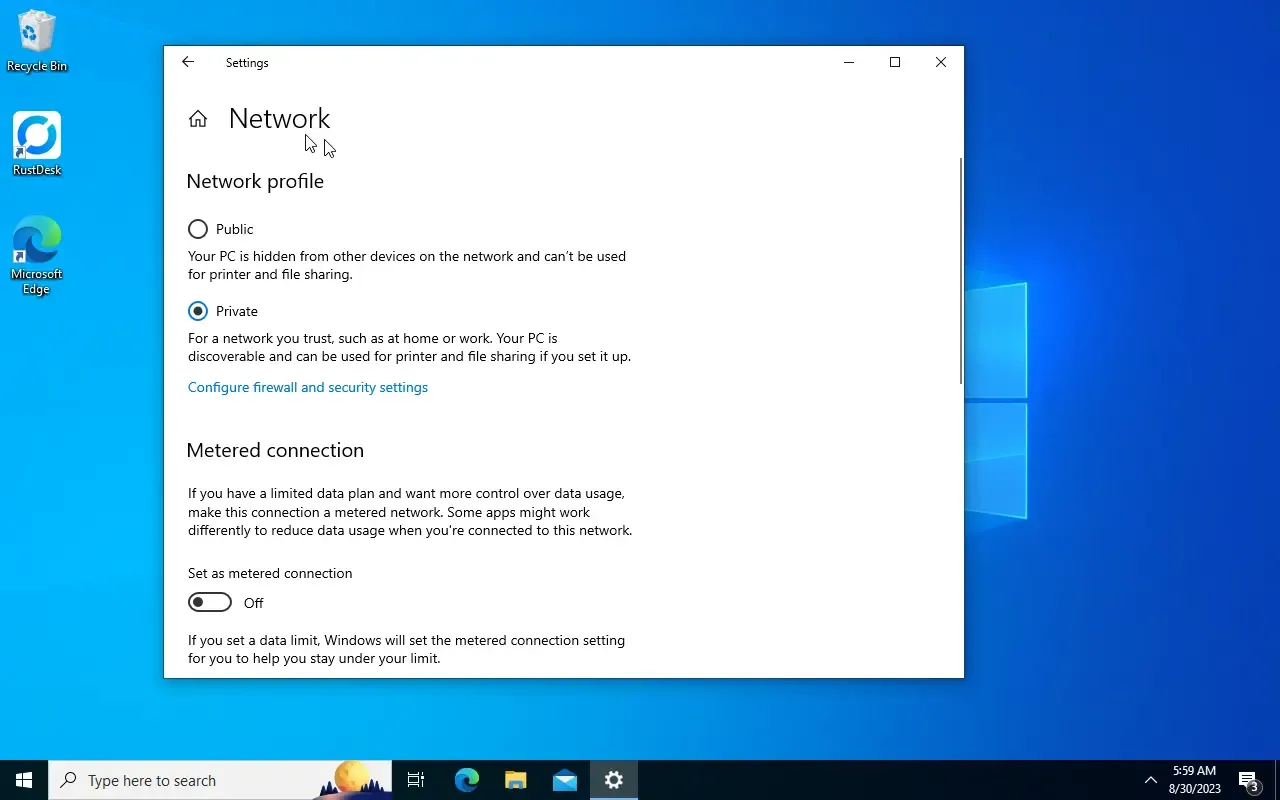
You may also need to designate your network connection as Private in order for the server to be available on the network:
At this point you should be able to log in via ssh from a1:
ssh admin@a4
Creating Windows users with Ansible
Finally let's create our users on Windows too. Here's a playbook that does the trick:
- name: Create Windows user accounts
  hosts: windows

  vars_files:
      - common_users.yml

  tasks:
     - name: Create common user accounts
       loop: "{{ common_users }}"
       win_user:
          name: "{{ item.name }}"
          password: "{{ item.password }}"
          state: present
          groups: Administrators
To run it just execute:
ansible-playbook win_users.yml --ask-vault-password
You may see a few warnings about some bios facts, etc. In the end however things did work out just fine.
Once it ran you should see your new users in the user management dialog:
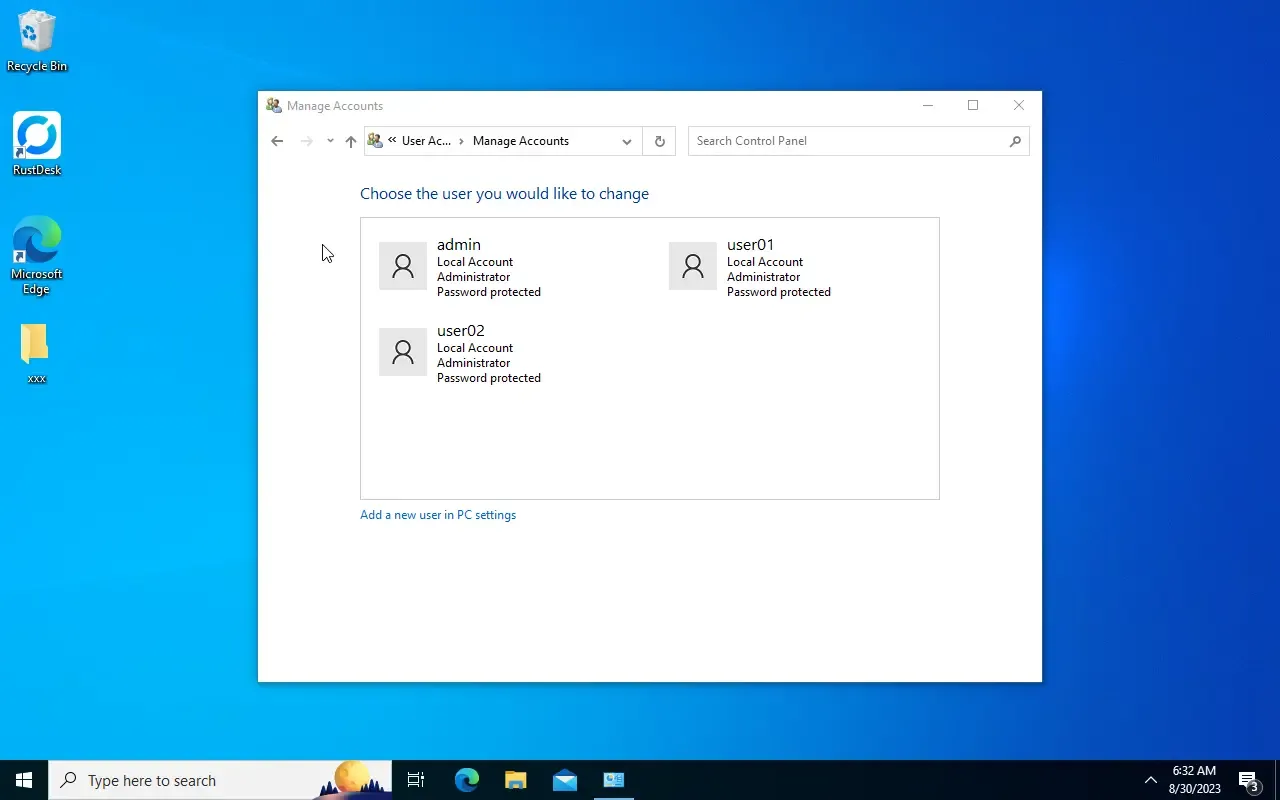
Note that I've statically assigned the
AdministratorsGroup to all users. Assigning a group of login users is essential to make the users interactive. Of course you can assign different groups and even do so in the User database file. For the sake of this example this group works fine.
Final Thoughts
This is an ideal setup to keep users synchronized in a smaller environment. Maybe just a lab but also your home network or even smaller companies. Eliminating the need for a central login server has it's benefits and might serve you well.
Be aware that it does fall short in cases where instant propagation would be a requirement. Adding or removing users, changing passwords, etc. might take a while depending on if each host in your network is online at the time your playbook is running. I have some ideas about that but in any case it will not fully replace corporate directory servers.
Other then that it's pretty amazing that many aspects of Windows may be managed by Ansible. And it doesn't stop there. Mac OS seems to be just as compatible as the various BSDs are. I'm looking forward to explore this nifty tool in greater depth and hope that you find some use for it too.
Troubleshooting
While Linux gave me no trouble the Windows part kept me busy for a while. Here's a few ideas on what could cause trouble when you try this for yourself.
Logging in to Windows via SSH does not work
- Is the OpenSSH Server running?
- Is your network adapter set to a private network?
- Make sure that the authorized key's file exists and that it contains your public key
- Make sure it's permissions are set correctly. Maybe remove others users that should not have access. Reduce it to yourself and the
SYSTEMuser. - Make sure
C:\Program Data\ssh\sshd_configcontainsAuthorizedKeysFile __PROGRAMDATA__/ssh/administrators_authorized_keys
The user shows up but I cannot log in
- Make sure your password isn't sent as a hash but in plain text
- Make sure your user belongs to a group that can log in
Users don't show up
First check if the users actually exist on the system. You can use Ansible directly to do that:
root@vm-ansible-01:/etc/ansible/plays# ansible a4 -m win_shell -a "Get-WmiObject Win32_UserAccount | Select-Object Name"
a4 | CHANGED | rc=0 >>

Name
----
admin
Administrator
DefaultAccount
Guest
user01
user02
WDAGUtilityAccount
If they show up, make sure that they are in a usable group (e.g. Administrators).
"Parameter format not correct ..." (Windows)
It's likely that you set ansible_shell_type to powershell. Try cmd instead.
SSH works but Ansible does not (Windows)
One of the very least things you can to to test the connection is use Ansible's own Ping:
root@vm-ansible-01:/etc/ansible/plays# ansible -m win_ping windows
a4 | SUCCESS => {
    "changed": false,
    "ping": "pong"
}
If this works, maybe there is something wrong with your playbook or the module you intend to use.
WARNING: Error when collecting bios facts ...
Don't worry too much about this. I have yet to figure out why this warning occurs but it has no impact on the result.
Further Resources:
- RedHat Summit talk 2018: Manage Windows like Linux with Ansible
- Superuser: Ansible : Configuring a Windows Host
- DigitalOcean: How To Use Ansible Vault to Protect Sensitive Playbook Data
- TechRepublic: How to install the OpenSSH server on Windows with PowerShell
- Microsoft: Get started with OpenSSH for Windows
- SuperUser: Where should we locate authorized_keys when we use Windows 10 OpenSSH server and WSL2?
- StackOverflow: Setting up OpenSSH for Windows using public key authentication
- StackOverflow: Ansible fails to connect from Linux to Windows via SSH
- Ryan Daniels: User Management with Ansible